What did I learn?
This is one of my favorite projects as I have always been a huge Portal fan. I learned to work with DirectX11’s graphics pipeline and to use certain parts within that pipeline to switch out render targets and resource views. A lot of trial and error went into this project to eventually get to the desired demo that I ended up with. I also properly learned to work with HLSL by writing my own Vertex and Pixel Shaders to create post-processing effects and the portal effect that you see in the demo. I had also never worked with the PhysX API so this project also allowed me to delve deeper into that API to handle collision handling and the general physics of my demo.
___________________________________________________________________________________
Introduction
For my Graphics Programming 2 course I was tasked to (re-)create a game in a custom-built C++ engine called Overlord. Seeing as I've always been interested in the inner workings of Portal and its famous portal mechanic & rendering techniques, I saw this as a golden opportunity to implement it for myself.
he Overlord engine itself is a C++ engine which consists of the DirectX 11 API which was new to us. This meant carefully studying/researching the DirectX rendering pipeline before implementing actual gameplay logic.
Researching the logic
Portal Rendering
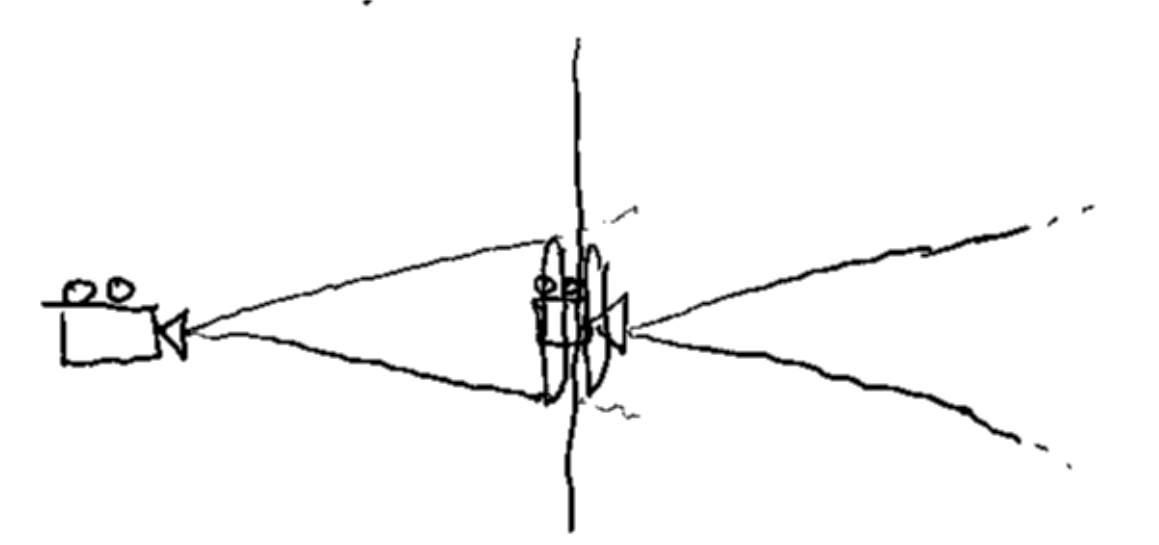
The most straight-forward way to handle the portal-rendering problem is to use 2 different cameras, 1 linked to each of the two portals.
With just this logic it would seem as if we were looking at a painting. The cameras don’t take into account the player’s camera yet and how the player is positioned relative to a portal. This means we have to make sure that the portal cameras’ orientations are relative to the orientation of the player camera.
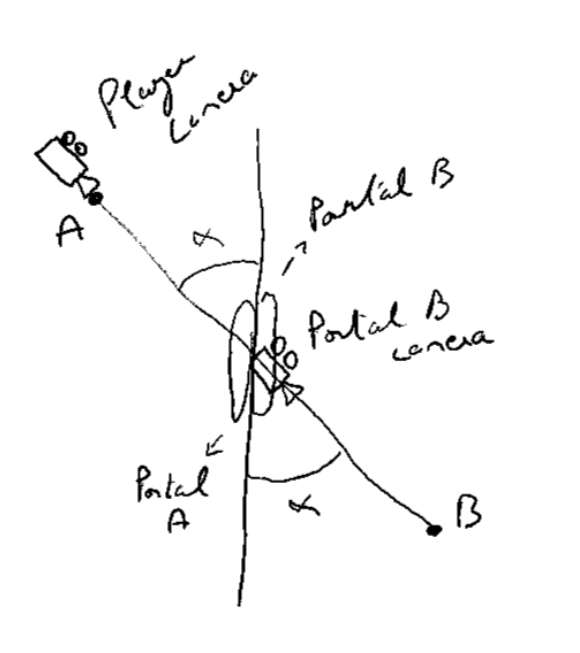
This means that in the illustration the angle between point A and portal A should be the same as the angle between point B and portal B.
Now when the player moves around the portal, the camera linked to the OTHER portal rotates relative to the player’s orientation.
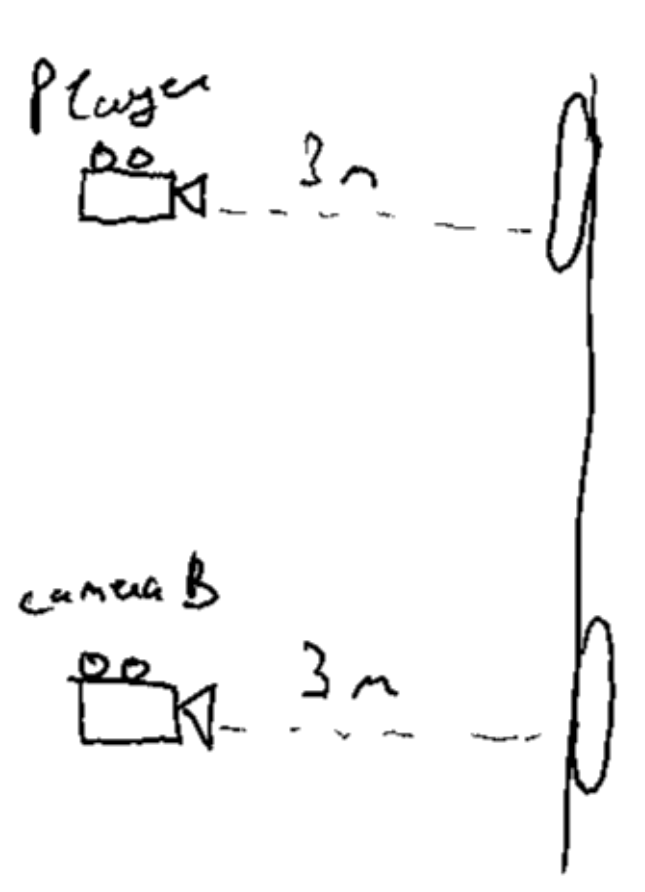
But this still isn’t 100% correct because the portal cameras are currently positioned inside of their linked portal. This means we aren’t taking the player’s position into account yet.
The solution for this is making the portal cameras’ positions relative to the player position as well. For example, if the player is standing at a distance of 3 meters in front of a portal, then the camera linked to the other portal should also be at a distance of 3 meters behind its linked portal.
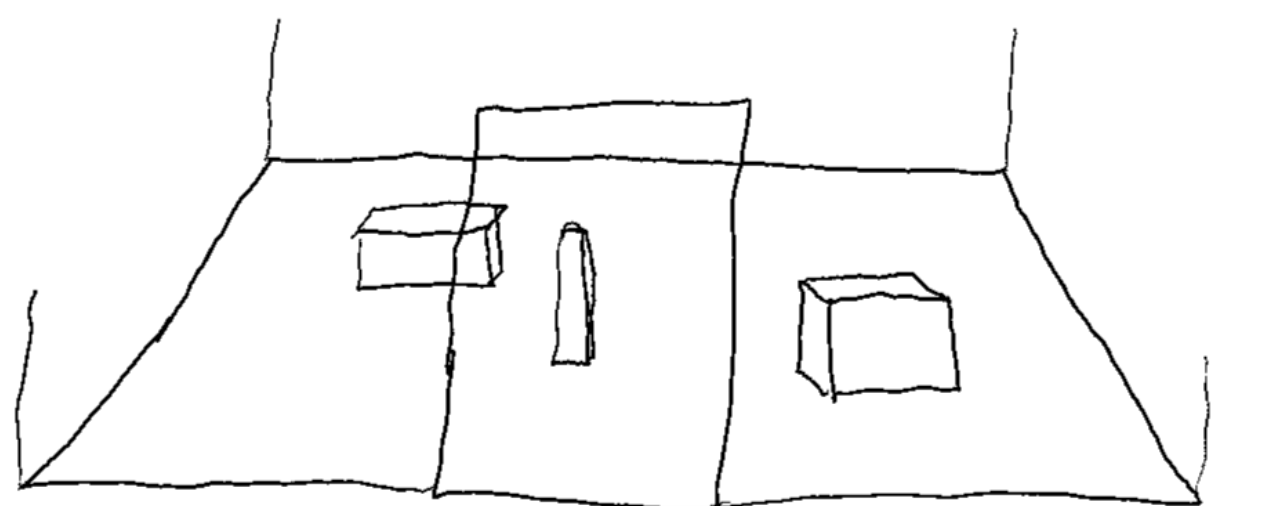
This now creates a new problem. Imagine you’re standing 3 meters in front of a portal and on the other side of that portal, 3 meters further, lies a cube. Then the distance between the player and that cube should be 6 meters.
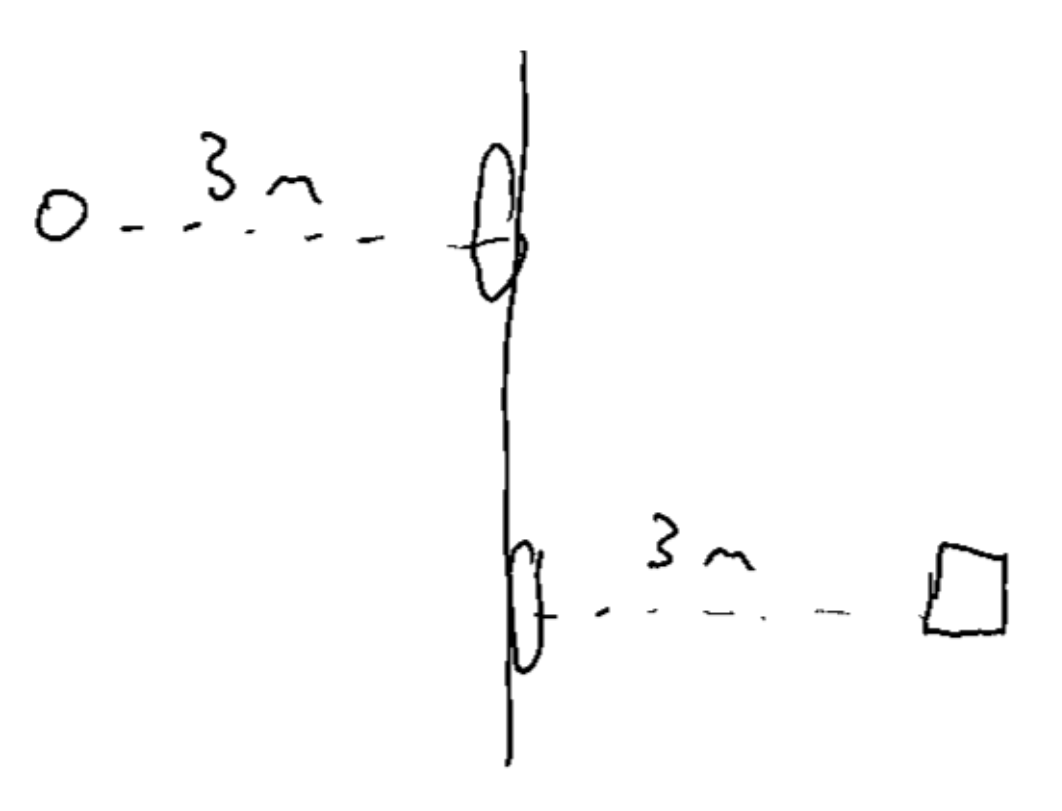
But since we moved the other portal camera 3 meters behind its linked portal, there will be a distance of 9 meters between the player and the cube instead of the expected 6 meters.
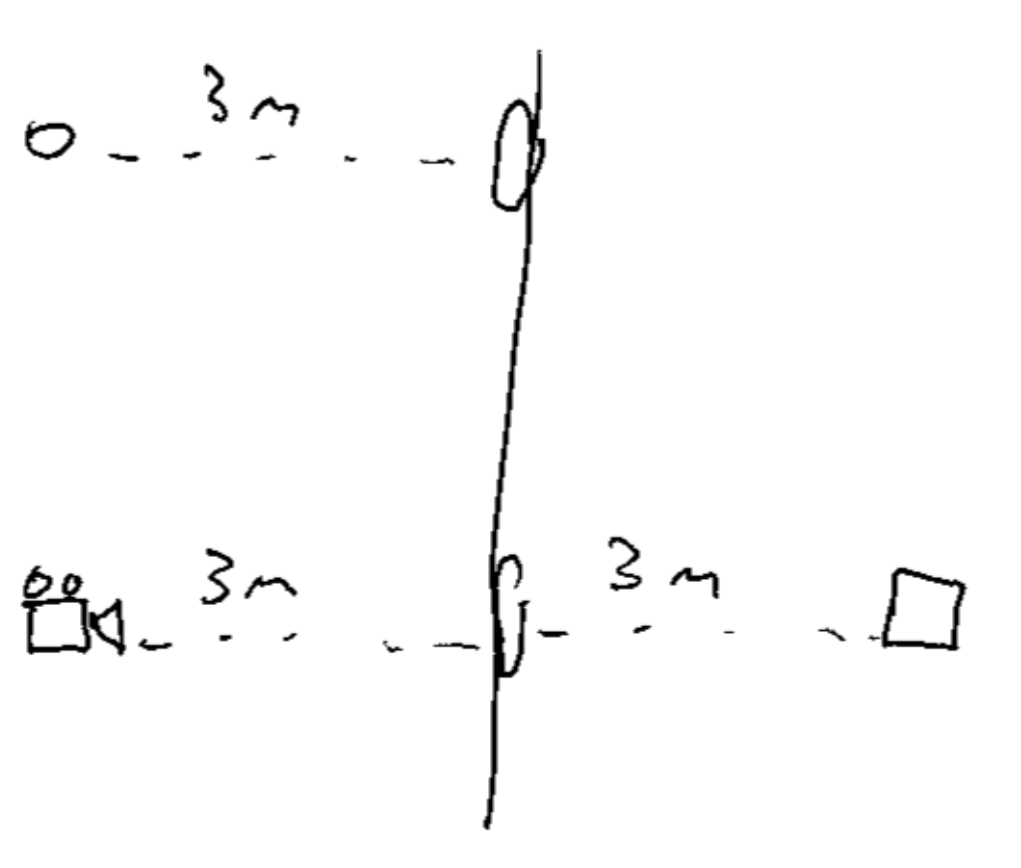
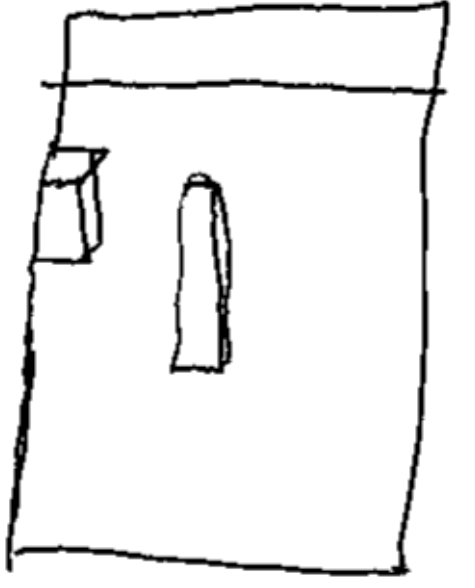
In order to fix this, theoretically speaking, you would have to mask out a part of the other portal camera’s image and then resize that to fit the full surface of the portal through which the player is currently looking.
So we’d have to go from this:
To just this:
Teleportation Logic
An idea to handle the teleportation of the player from one portal to the other is by disabling the collision between the player and the environment as soon as the player overlaps with a portal.
To make sure that the player doesn’t fall through the floor you could add an invisible cut-out frame around the portal which still handles collision between itself and the player. This way, whenever the player enters a portal, the only thing they can still collide with is that portal-frame.
Camera Maths
To test out the portal cameras’ mathematics I used Geogebra to get a better visual understanding of what needs to happen.
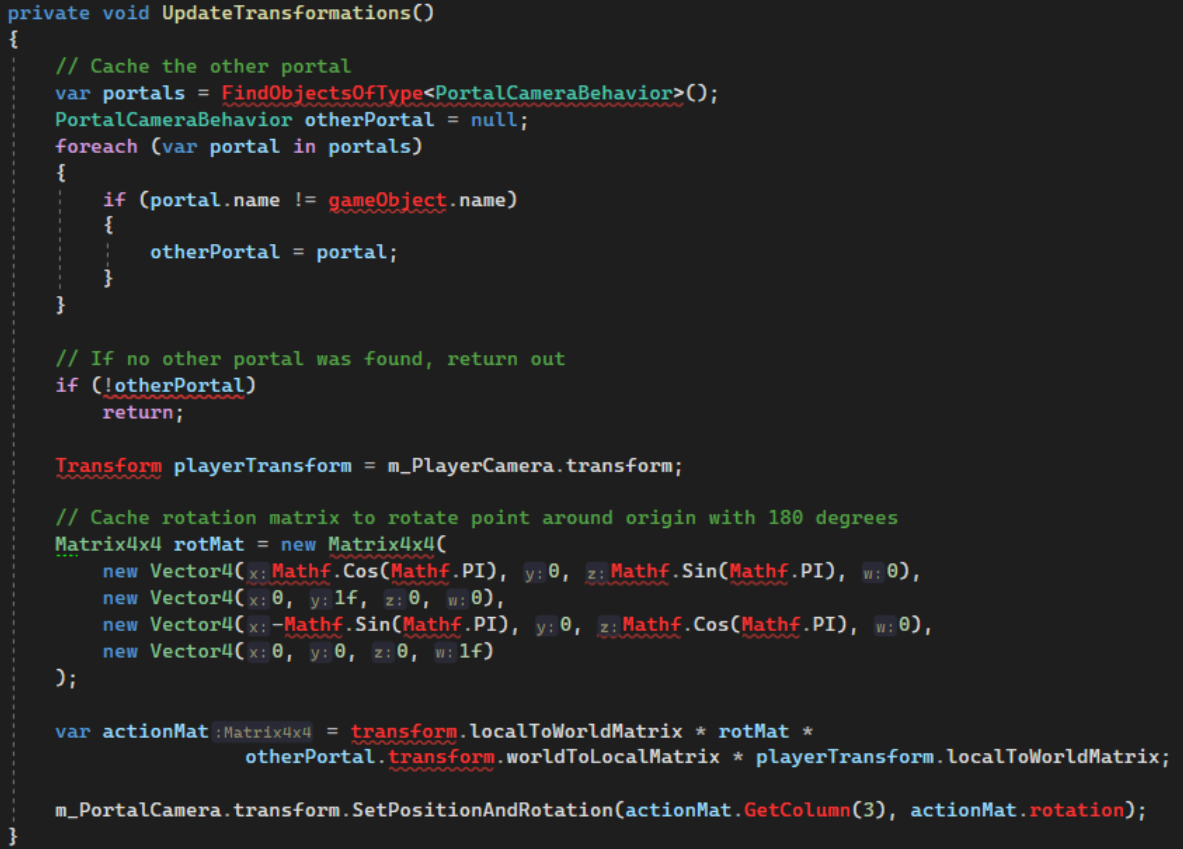
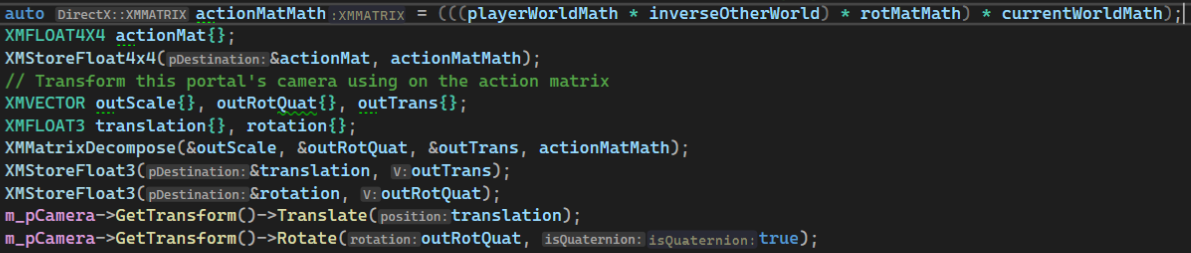
In order to calculate the portal cameras’ transformations I will need several things: the inverse and normal world matrices of both portals, the player position and a rotation matrix which rotates the player 180 degrees around the world origin.
To calculate the action matrix which determines a portal camera’s transformation I multiply the inverse world matrix of the other portal, multiply that with a rotation matrix which rotates the camera 180 degrees around the world origin, multiply that with the world matrix of the portal linked to the current camera and then finally multiply that with the players world matrix.
In Unity this looks like this:

Unity Implementation
To prototype this mechanic I planned 2 days of work in Unity to get a rough version of the portal logic going.
The first thing I did was create a portal prefab and add a camera which would later be used to set the target texture of the portals using Unity’s built-in shader language.
I applied the camera transformation logic as explained above:
(The update from VS 2019 to 2022 is causing the errors, but this is the logic that I used to determine the camera transformations).
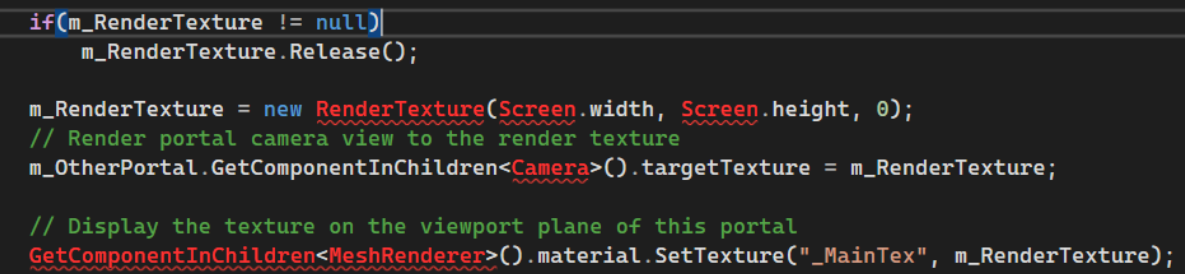
After this I had to apply the portal camera views to the portal surfaces by creating a RenderTexture object and linking that to the targetTexture member of the camera.
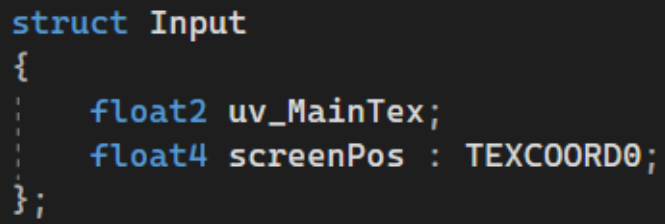
To handle the masking-out part of each portal camera’s view texture I used a float4 for the UV-coordinates in the input struct of the portal shader. The w-component in this float4 member represents the projected z-component with which I can divide the x- and y-components. This performs a perspective divide which properly displays the output texture.

Overlord Implementation
The implementation of the portal mechanic in the Overlord engine went a lot more difficult than it did in Unity (as expected) but it was a very fun process. I learned about the usage of render targets in DirectX and the general graphics pipeline that DirectX uses.
The first thing I did in Overlord was the implementation of the portal camera logic again. This turned out to be not so different from the Unity implementation apart from the use of different functions and a different mathematical execution order which I had to take into account.
At first I wasn’t sure how I would go about using the cameras’ view textures to apply them to the portal surfaces like I did in Unity. I then learned that it wouldn’t be so easy in C++ using DirectX.
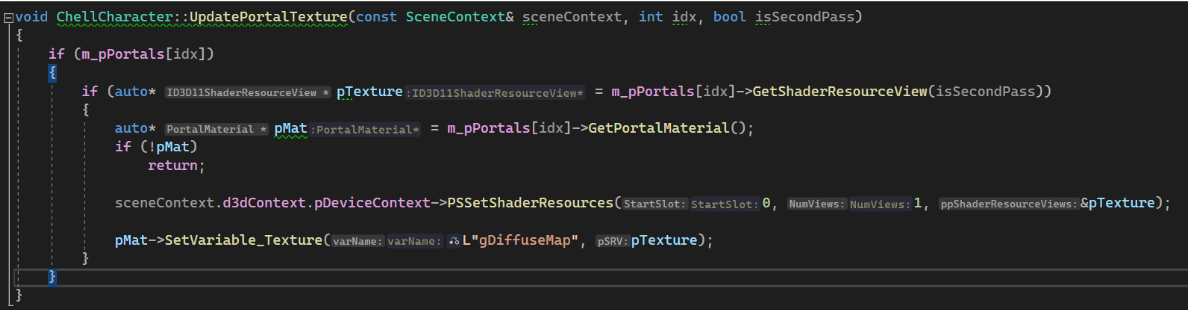
Each portal instance has its own render target view to render towards, an ID3D11Texture2D object to hold the actual texture data and a shader resource view which can be bound as a texture for use in the actual shader.

To actually render the camera data to their respective render targets I wrote a function in my main scene which would first reset the active shader resource view in the graphics pipeline so that I could activate the first render target (you can’t have an active render target view AND and active shader resource view at the same time in the pipeline to do this), then set portal B’s camera as the active scene camera and set the render target bound to that portal as the active render target in the main pipeline. Next I would render all the game objects present in my scene which would fill up the active render target with new data:

I ultimately reset the active render target in the pipeline and then, with portal B’s render target filled up, I update the portal texture:
I then repeat this process for the other portal so that both surfaces have their proper textures applied to them.
Conclusion
I really liked working on this project as it helped me:
- Explore the inner workings of DirectX;
- Learn to work with render targets;
- Manipulate the pipeline using render target views and shader resource views;
- Learn to write HLSL to actually apply the portal effect and other post-processing effects into my demo.
SOURCES
I started by researching the maths and logic behind the portal logic. For this I based myself on numerous different sources:
https://www.youtube.com/watch?v=cWpFZbjtSQg
https://www.youtube.com/watch?v=_SmPR5mvH7w
http://www.directxtutorial.com/Lesson.aspx?lessonid=111-4-4